Sunday, 22 January 2017

Inkspired Blog Hop 49


Good evening everyone and welcome to the latest Inkspired Blog Hop! You may have come from Lissa who makes lovely cards.

Here is this fortnights sketch:


It is another square card and here is my interpretation:


I needed a birthday card and thought that the recipient would like the Lift Me Up stamp. I stamped the balloons using Versamark on Basic Black and embossed the images using the Copper Embossing Powder. I then used my heat gun and the Up & Away thinlits to cut them out. I used Mint Macaron for my card base (a six inch card) and the Carried Away Designer Series Paper for the background. I thought it looked a bit like snow or rain (not that I would want to be in a hot air balloon in the rain or snow!). I then attached the Peekaboo Peach Ruched Ribbon before attaching the patterned paper to the front of the card. I stamped the sentiment in Peekaboo Peach  mounted it onto the reverse side of the patterned paper.

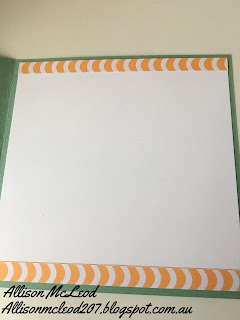
I decided to do a couple of things that I don't always do. Firstly I decided to decorate the inside of the card:


I cut a couple of strips from the DSP and lined the Whisper White I placed inside the card.

The other thing that I did was make an envelope for the card. I admit normally I just buy them!


I used the 2016-18 Envelope Paper and Envelope Punch Board to create the matching card.

Next on the hop is Maree. I can't wait to see what she creates!


Until next time,

Allison


Sunday, 15 January 2017

Balloon Adventures Shaker Card

Good evening! While it was still humid today, hopefully everyone was able to enjoy slightly cooler weather.

At the end of last year I was talking craft with a friend and she expressed an interest in learning to make a shaker card. I saw a version of this card in the Occasions Catalogue and thought it would be a good one to recreate.


I created a card base and covered it in Party Animal Designer Series Paper. I then used the Balloon Pop-Up Die to cut out the topper in Emerald Envy. I cut a piece of Whisper White and glued it to the card front. I then used the Foam Adhesive Strips around the edges and placed some Bright Sequins inside the area. I also used the Sprinkles punch several times with Emerald Envy. I then attached a Window Sheet to the section. I then attached to topper to the front of the card.

I then stamped the banner and sentiment in Emerald Envy onto Whisper White Cardstock from the Balloon Adventures stamp set. I fussy cut it and attached it to the card topper. I then cut out the balloons out from Real Red Cardstock and attached them.

Remember the Occasions Catalogue is live as is SALE-A-BRATION! For every $90 spent you can choose 1 item from the SALE-A-BRATION Catalogue. Please contact me if you want to order anything.

Until next time,

Allison

Sunday, 8 January 2017

Inkspired Blog Hop 48


Hi everyone and welcome to the first INKspired blog hop of the year! You may have come from the talented Lisa. I always look forward to see how the other women have interpreted the sketch we were given.

Speaking of sketches, here is the one for this fortnight:


The first thing I noticed about this card is that it is a square card. I had lots of ideas for this sketch but finally settled on this card:


This is a 4 inch easel card. It supports itself when sitting on a table. I thought about what the temperature will be like today and according to the weather reports, it will be 36, followed by 39 tomorrow and several days this week! That is hot, so I thought I would make an ice cream card!


I love the Cool Treats product suite! I used Whisper White for my card base and covered the easel part of my card in Tasty Treats Specialty Designer Series Paper. Always decorate the front of your easel card BEFORE you attached it to your card base. It is so much easier that way!

I then used the Frozen Treats Framelits to cut the cones out of Crumb Cake. I stamped the ice cream and flavouring using Watermelon Wonder and Chocolate Chip, using the Cool Treats stamp and die cut them. I could have just cut them using the framelits, however, it was easier for me to find my Chocolate Chip and Watermelon Wonder ink than it was for me to find the corresponding card stock!!


I attached them to the card front and then attached the card front to the card base. I used a sentiment from the Cool Treats stamp set and cut a frame around it. I then attached it to the inside of the card base using Stampin' Dimensionals.

Next up is Maree, she always make wonderful cards. 


Until next time time, have fun crafting!!

Allison.